DMARC
DMARC protects your domain from email spoofing and helps your emails land in the inbox instead of spam.
What is DMARC?
DMARC stands for "Domain-based Message Authentication, Reporting, and Conformance."
In simple terms, DMARC tells email providers (like Gmail, Outlook, Yahoo) what to do when someone tries to send an email pretending to be from your domain.
Think of it like a security guard for your email domain:
- It checks if emails are really from you
- It tells email providers how to handle fake emails
- It sends you reports about who's using your domain
Why Do You Need DMARC?
Without DMARC, anyone can send emails that look like they're from your domain. This leads to:
- Phishing attacks - Scammers can trick your customers by pretending to be you
- Damaged reputation - Fake emails hurt your brand trust
- Poor deliverability - Email providers are less likely to trust emails from domains without DMARC
With DMARC, you tell email providers: "Only trust emails from my domain if they pass authentication checks."
How DMARC Works
DMARC works together with two other email authentication methods:
| Method | What It Does |
|---|---|
| SPF | Checks if the email came from an authorized server |
| DKIM | Checks if the email was tampered with during delivery |
| DMARC | Tells providers what to do if SPF or DKIM fails |
Good News
If your domain is verified with ToSend, you already pass SPF and DKIM checks. Adding DMARC is the final step to complete your email authentication.
Setting Up DMARC
Step 1: Make Sure SPF and DKIM Are Working
Before adding DMARC, verify that your domain is fully verified in your ToSend dashboard. Both DKIM and SPF records should show as verified.
Step 2: Add the DMARC Record
Add a TXT record to your DNS with these settings:
| Field | Value |
|---|---|
| Type | TXT |
| Name | _dmarc |
| Value | v=DMARC1; p=none; rua=mailto:dmarc@yourdomain.com |
Replace yourdomain.com with your actual domain name.
What Each Part Means
v=DMARC1- This tells email providers it's a DMARC recordp=none- The policy (what to do with failed emails)rua=mailto:...- Where to send reports about your email authentication
DMARC Policies Explained
The p= part of your DMARC record is the policy. It tells email providers what to do when an email fails authentication.
p=none (Monitor Mode)
v=DMARC1; p=none; rua=mailto:dmarc@yourdomain.comWhat it does: Nothing! Emails are delivered normally, even if they fail checks.
Best for: Starting out. Use this to monitor your email sources without affecting delivery.
p=quarantine (Spam Folder)
v=DMARC1; p=quarantine; rua=mailto:dmarc@yourdomain.comWhat it does: Failed emails go to the spam folder.
Best for: After you've confirmed all your legitimate email sources pass authentication.
p=reject (Block Completely)
v=DMARC1; p=reject; rua=mailto:dmarc@yourdomain.comWhat it does: Failed emails are blocked entirely and never delivered.
Best for: Maximum protection after thorough testing.
Recommended Setup Process
Start Slow
Don't jump straight to p=reject. You might accidentally block your own legitimate emails.
Follow these steps for a safe DMARC rollout:
Week 1-2: Monitor
Start with p=none to see what's happening:
v=DMARC1; p=none; rua=mailto:dmarc@yourdomain.comCheck the reports to see all services sending email from your domain.
Week 3-4: Quarantine
Once you're confident all legitimate sources pass:
v=DMARC1; p=quarantine; rua=mailto:dmarc@yourdomain.comWeek 5+: Reject
After confirming no issues with quarantine:
v=DMARC1; p=reject; rua=mailto:dmarc@yourdomain.comUsing Cloudflare for DMARC
If you use Cloudflare for your DNS, setting up DMARC is even easier with their built-in DMARC Management feature.
Why Use Cloudflare DMARC Management?
- One-click setup - No need to manually write DMARC records
- Visual reports - See who's sending email from your domain in a simple dashboard
- Easy policy changes - Switch between none, quarantine, and reject with a click
- Free - Available on all Cloudflare plans
How to Set Up DMARC with Cloudflare
- Log in to your Cloudflare dashboard
- Select your domain
- Go to Email → DMARC Management
- Click Enable DMARC Management
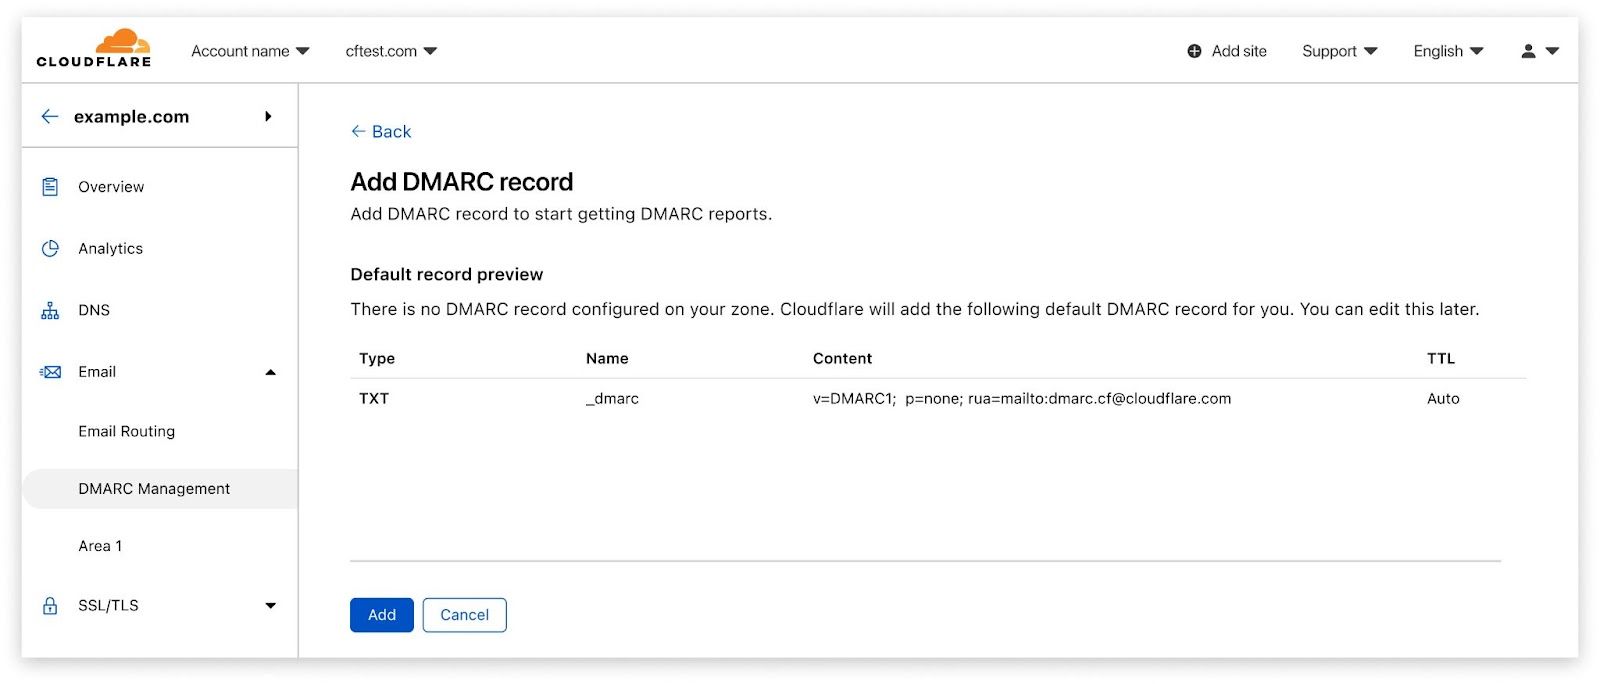
Cloudflare will automatically:
- Create the DMARC DNS record for you
- Start collecting authentication reports
- Show you easy-to-read summaries
Viewing Reports in Cloudflare
Once enabled, Cloudflare shows you:
- Passing emails - Emails that passed SPF and DKIM
- Failing emails - Emails that failed authentication
- Email sources - Which servers are sending email from your domain
This helps you identify:
- Legitimate services you forgot to authorize
- Attackers trying to spoof your domain
- Misconfigured email systems
TIP
Cloudflare's DMARC reports are much easier to read than raw DMARC report emails, which are in XML format.
Checking Your DMARC Record
After adding your DMARC record, verify it's working:
Online Tools
- MXToolbox DMARC Lookup - Enter your domain to check
- DMARC Analyzer - Detailed DMARC analysis
Check Email Headers
When you receive an email, look at the headers for:
dmarc=passThis confirms DMARC is working correctly.
Common Questions
Do I need DMARC?
While technically optional, DMARC is highly recommended. Major email providers like Gmail and Yahoo now require DMARC for bulk senders. Even if you're not a bulk sender, DMARC improves your email deliverability and protects your domain.
Will DMARC break my emails?
Not if you start with p=none. This policy only monitors - it doesn't affect email delivery. Only move to stricter policies after confirming everything works.
What if I use multiple email services?
That's fine! DMARC works with any number of email services. Just make sure each service is properly configured with SPF and DKIM. ToSend handles this automatically for emails sent through our API.
How long does DMARC take to work?
The DNS record typically propagates within a few hours. However, you'll want to monitor for at least 1-2 weeks before changing your policy to make sure you've identified all your email sources.
What are DMARC reports?
DMARC reports are daily summaries sent to the email address in your rua= tag. They show which emails passed or failed authentication. These reports are in XML format, which is why tools like Cloudflare DMARC Management are helpful - they translate the data into readable charts.
Summary
| Step | Action |
|---|---|
| 1 | Verify your domain in ToSend (DKIM + SPF) |
| 2 | Add DMARC record with p=none |
| 3 | Monitor reports for 1-2 weeks |
| 4 | Upgrade to p=quarantine |
| 5 | After testing, upgrade to p=reject |
Cloudflare Users
Use Cloudflare's DMARC Management for the easiest setup and best reporting experience.